I have recently built an air quality monitor. I am releasing all resources necessary to build one yourself. The costs are about 60 €. The device is able to measure the following values:
- CO2 concentration
- VOX concentration
- Particulate matter (PM 1.0, PM 2.5, PM 10.0)
- Temperature
- Pressure
- Humidity
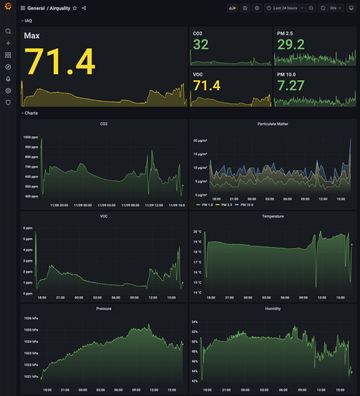
Additionally, the device calculates, to some degree standardized, air quality indices (IAQ, AQI, ..., the abbreviation does not appear to be standardized). Basically it's telling you how badly you should open a window.
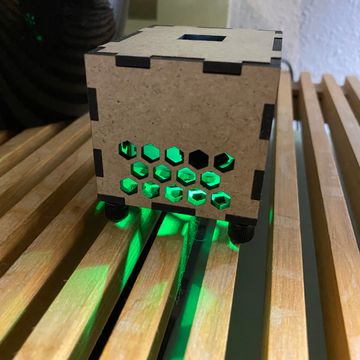
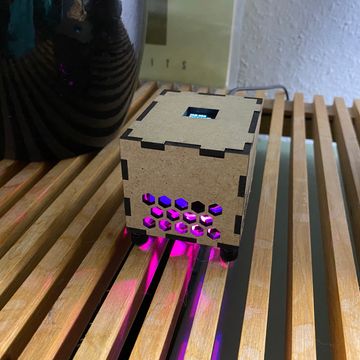
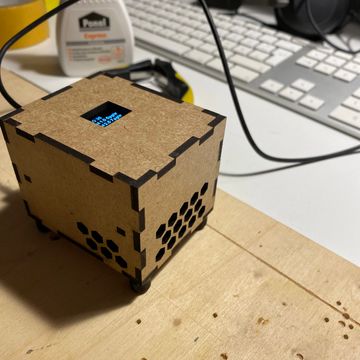
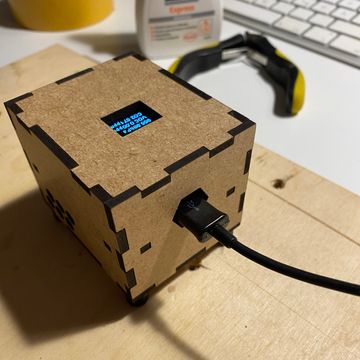
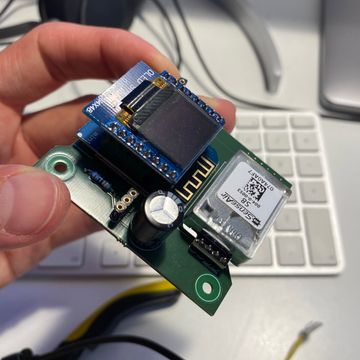
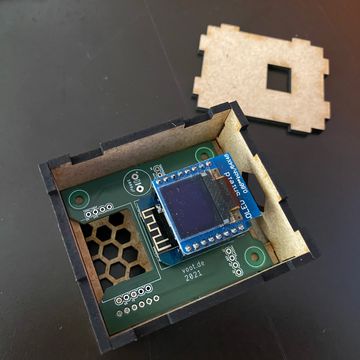
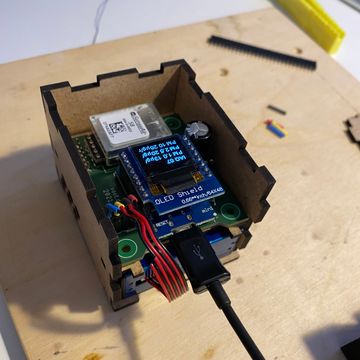
The device has a tiny display which iterates through all measurements and indices. Additionally, it has an RGB LED which represents the overall air quality. If the device shines red, it's time for fresh air. Measurements are also exposed via a Prometheus endpoint. Prometheus and Grafana are running on a Raspberry Pi.


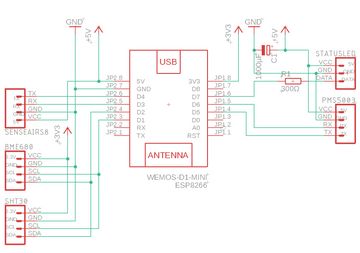
The device consists of the following parts:
- Wemos D1 Mini, ~2.50€
- 0.66 inch OLED Display Module for Wemos D1 Mini, ~3€
- Senseair S8 (CO2 sensor), ~25€
- PMS5003 (particulate matter), ~14€
- BME680 (VOX, temperature, humidity, pressure), ~12€
- WS2812 LED, ~0.10€
- SHT30 (temperature, humidity), ~3€
It also has a night mode - between 23:00 and 08:00 the display switches off and the LED is dimmed.
The time is fetched from the internet, as the Wemos has no real time clock.
Particulate matter is only measured every 5 minutes, as this is supposedly prolonging the lifetime of the sensor.
The sensor is activated first, after a warm-up period of 30 seconds a measurement is taken, then the sensor is sent back to sleep for 4 ½ minutes.
The SHT30 was added later on, as the temperature readings of the BME680 were unusable. The BME680 is primarily designed to measure the VOX concentration. It does this by heating a metal plate and measure its conductivity. A temperature sensor is also packed into the chip, which I assume is necessary for reliable VOX readings. The heated plate seems to affect the temperature readings quite a lot - actually not too surprising, the chip is tiny. According to the documentation, this is corrected for in software, but my readings were about 10 °C to high. Therefore, I decided to add a separate temperature sensor later on. Fortunately this was still easily possible without changing the PCB or case, as both the SHT30 and BME680 communicate via I2C, the I2C pins were still accessible and there was just enough space left in the case to squeeze the new sensor in.
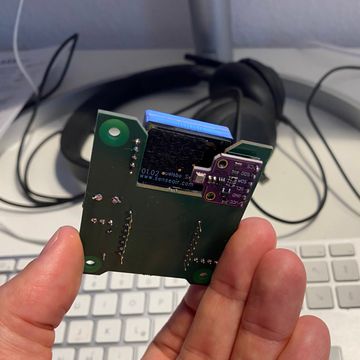
PCB
The PCB is designed in Eagle. The design files are supplied and can be used to order your own board. The files can be found here. Alternatively you can skip the PCB part and just solder all parts together. The schematic is not very complex and it should be fairly easy. If you decide so, use the following schematic to connect the parts.


Firmware
PlatformIO is needed to flash the Wemos with the firmware.
To flash the firmware, use the following commands. The firmware can be found here.
git clone https://github.com/marcoschulte/airquality-thing
cd airquality-thing
pio project init
pio run --target upload
Case
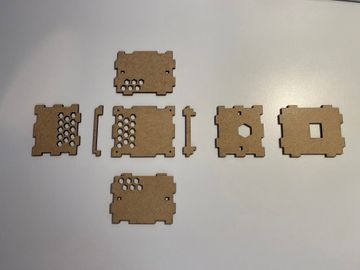
The case has been designed in Fusion 360 and is laser cut. Fusion files are added to the repo, as well as PDF and Illustrator files of all faces. A version with 0.05 mm offset is also added, which helps in accounting for the width of the laser beam, so the parts have a tight fit. The files can be found here.


Dashboard
I am running Prometheus und Grafana on a Raspberry Pi to collect and visualize the data. Both services are started with docker compose. All files can be found here. To start them, execute the following commands.
git clone https://github.com/marcoschulte/airquality-dashboard.git
docker-compose up -d
Grafana is exposed on port 3000, Prometheus on port 9090.
Both services are automatically provisioned with a Prometheus target config and the Grafana Dashboard.
Their config files are in their respective folders in the repo and can be changed prior to starting them up.
By default, Prometheus is trying to collect data from a host with hostname airthing1.